Description
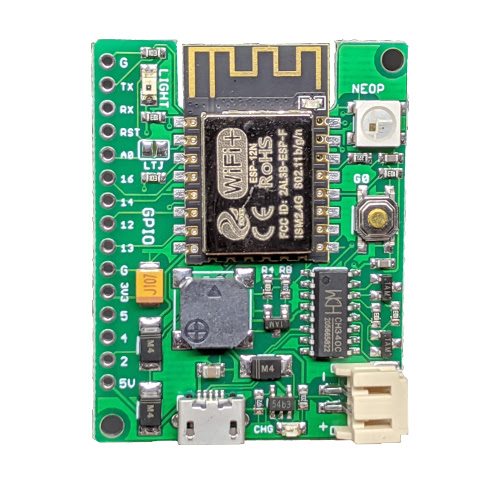
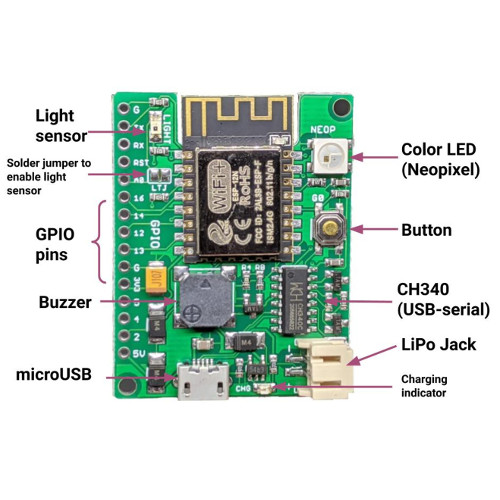
ESPToy is an all-in-one WiFi development board for ESP8266. This is version 2.0 — it has on-board Neopixel color LED, mini buzzer, button, light sensor, LiPo battery jack and charging chip. It also has built-in CH340 USB-serial and is fully compatible with LOLIN Wemos D1 Mini. The board is pre-flashed with a demo software written in Arduino with ESP8266 core.
New Features in V2.0:
- Added built-in auto reset circuit, allowing direct upload of a new program (previously requiring a bootloading procedure).
- Changed color LED to WS2812 Neopixel (previously using standard color LED occupying 3 GPIO pins).
- Added mini-buzzer to make sound (previously none).
- Added light sensor and solder jumper (LTJ) to disable or enable the sensor (when enabled, it’s connected to analog pin A0).
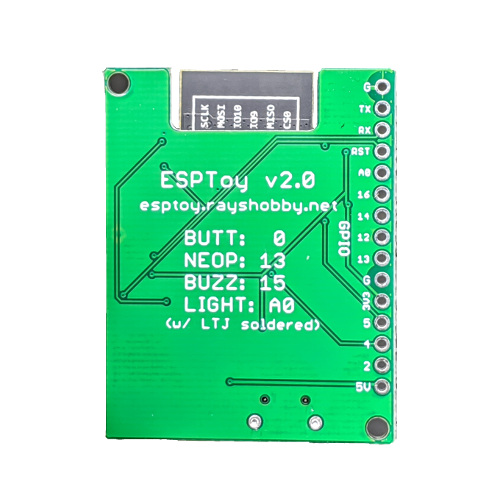
- GPIO pins assigned to built-in components are printed at the back of the board.
* (Version number is printed at the back of the circuit board).
Features:
- Fully assembled with ESP-12 WiFi module (4MB flash)
- Demo program written in Arduino with ESP8266 core.
- On-board color (RGB) LED and push-button.
- On-board mini buzzer and light sensor (v2 only).
- On-board micro-USB port and CH340G USB-serial chip (for uploading program and also serial communication).
- On-board 3.7V LiPo battery jack, charging chip (TP4054) and indicator LED.
- GPIO pin are mapped out on the side, for connecting external components and breadboard experiments.
Package Includes:
- One assembled and tested ESPToy circuit board (ESP8266 included)
- One microUSB cable
Instructions for Demo:
- ESPToy is pre-flashed with a demo program (source code is available in Github below). First, insert a micro-USB cable to power it up.
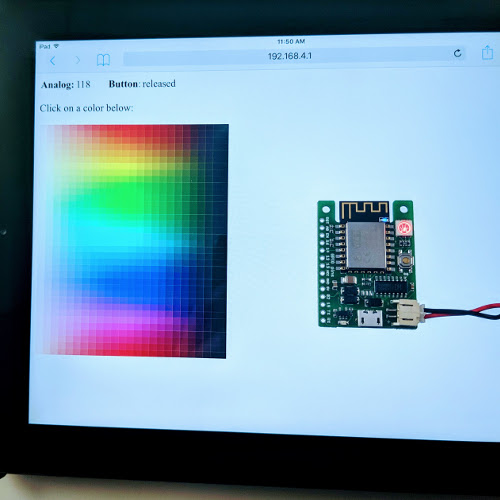
- Wait for a few seconds, a WiFi network with ssid ESPToy-xxxxxx will be created (xxxxxx depends on your specific board). Use your phone or laptop to connect to this WiFi. Then open a browser and type in 192.168.4.1
- Click any point on the color palette to select a color, the LED on ESPToy will change color accordingly. This makes a simple WiFi-controlled color LED.
- Hold the button and the webpage will show status change of button (pressed / released).
Using LiPo Battery:
- ESPToy can be powered by either USB, or an external 3.7V LiPo battery with JST connector. To use battery, plug it into the matching connector on ESPToy.
- ESPToy has built-in LiPo charging circuit, which allows the battery to be charged from USB cable.
- An on-board indicator LED shows the charging status: when lit, it indicates the battery is still charging; when off, it indicates the battery is fully charged.
Using Light Sensor (v2 only):
- Version 2 has added a built-in light sensor. By default, the sensor is disconnected from ESP8266.
- To enable it, locate the solder jumped marked LTJ close to the upper-left side of the board. Use a soldering iron to connect the jumper — this wires the light sensor signal to analog pin A0.
- To disable light sensor again (i.e. disconnect it from A0), just remove the solder jumper.
Technical Documents
