Today I am very excited to introduce OpenSprinkler Bee (OSBee) 2.0: it’s an open-source, WiFi-enabled, universal sprinkler controller. It is suitable for garden and lawn watering, plant and flower irrigation, hydroponics, and other types of watering project. This is the first OpenSprinkler product built upon the popular ESP8266 WiFi chip. It’s designed primarily for latching solenoid valves, but can also switch non-latching solenoid valves (such as standard 24VAC valves), low-voltage fish tank pumps (which can be used to feed water to flower pots and indoor plants), and other types of low-voltage DC valves and pumps. All of them can be powered from a single USB port. This is made possible by using a unique circuit design that leverages a boost regulator and a new solenoid driver circuit. Hence I call it a Universal sprinkler controller. Among the software features, it introduces the concept of Program Tasks, which provides maximal flexibility in programming the zones. In contrast to the first version of OSBee, which was in the form of an Arduino shield and relies on an additional Arduino, OSBee 2.0 is a standalone controller with built-in WiFi, OLED display, laser cut acrylic enclosure, and can switch up to 3 zones independently.
Here is not-so-short video introduction to OSBee 2.0:
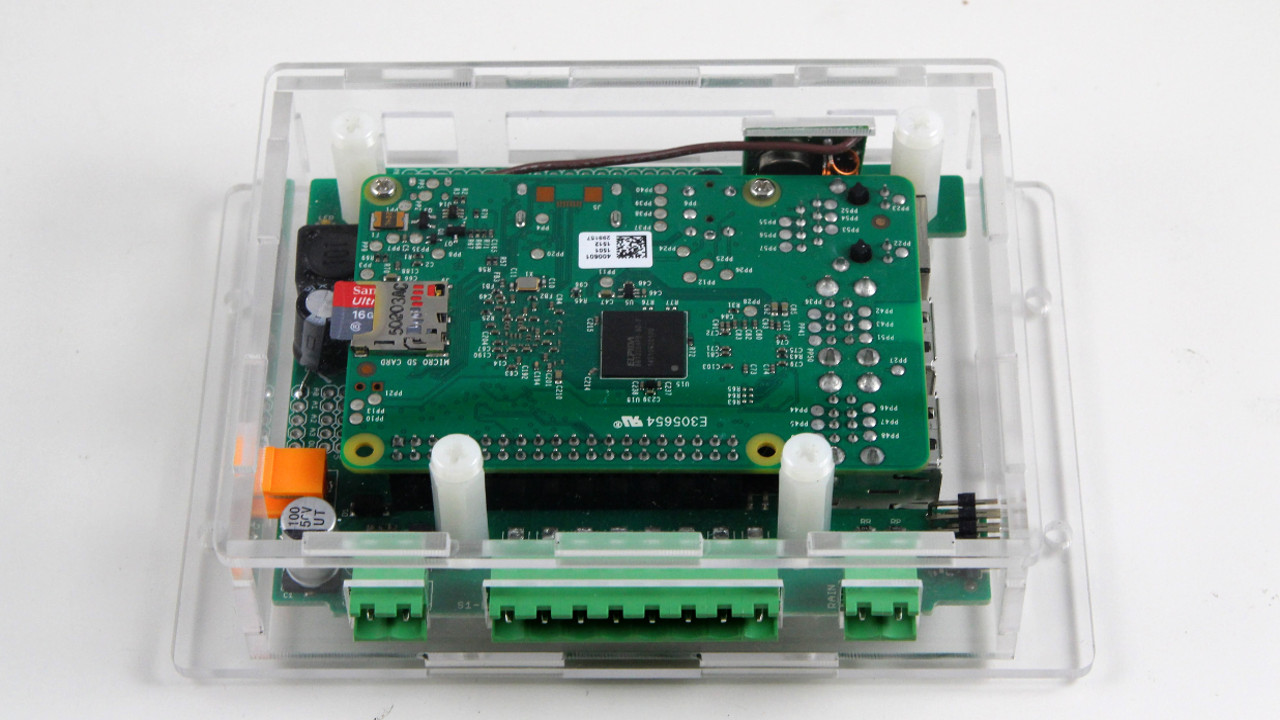
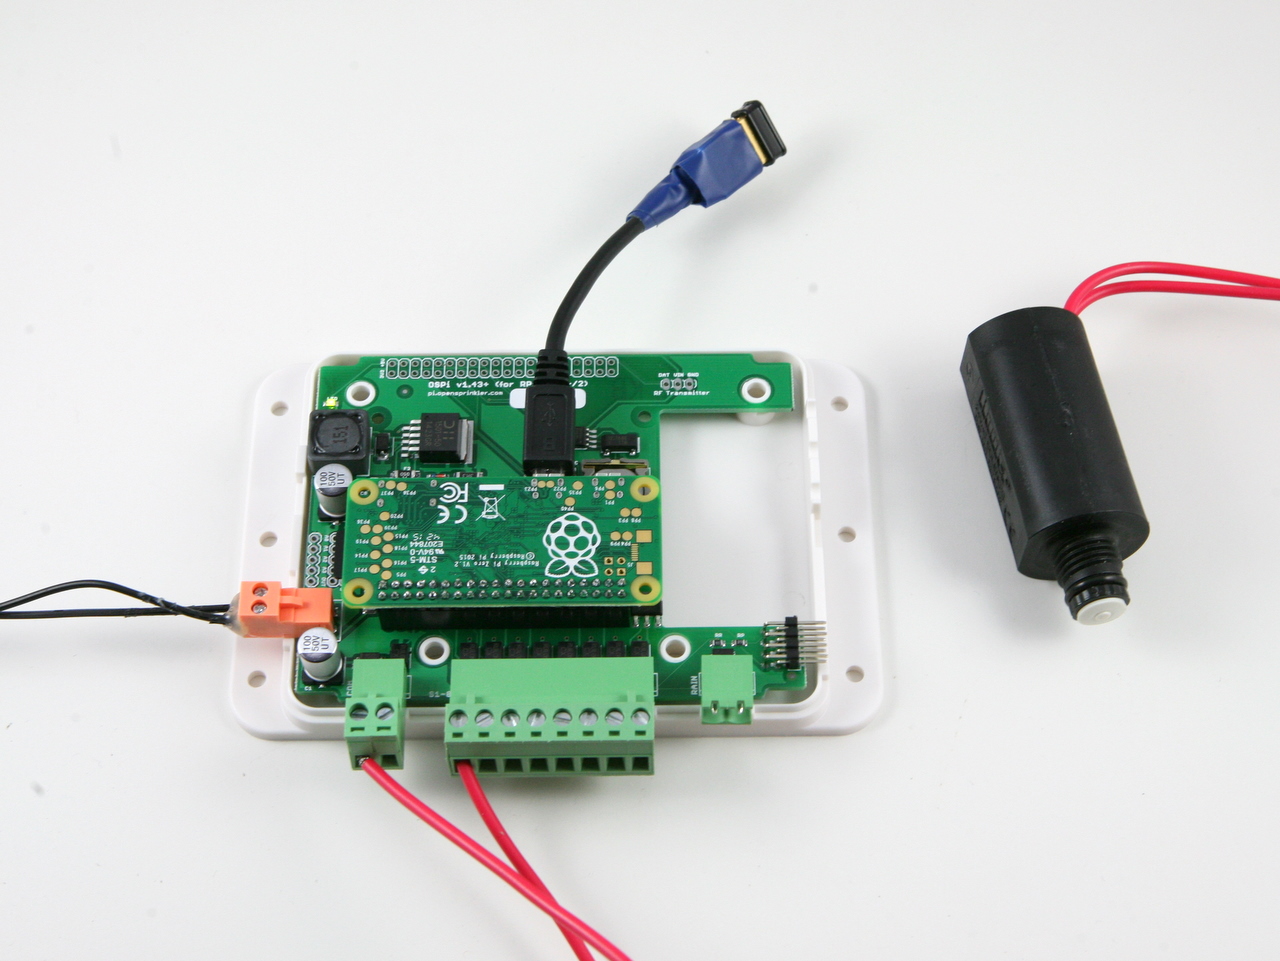
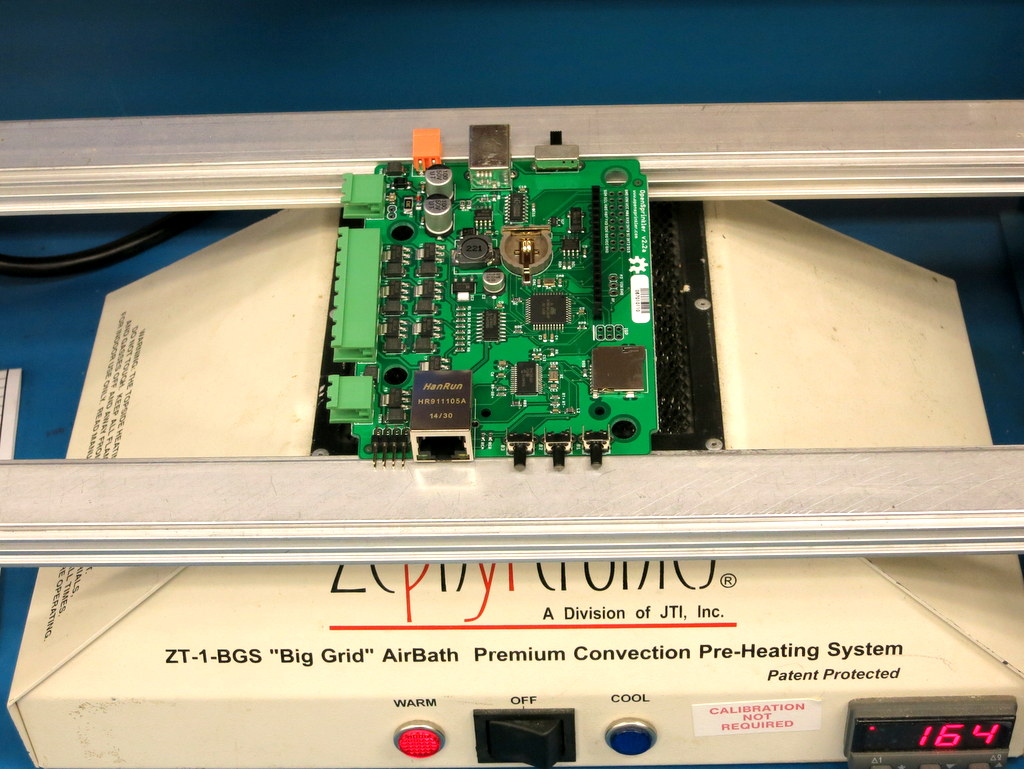
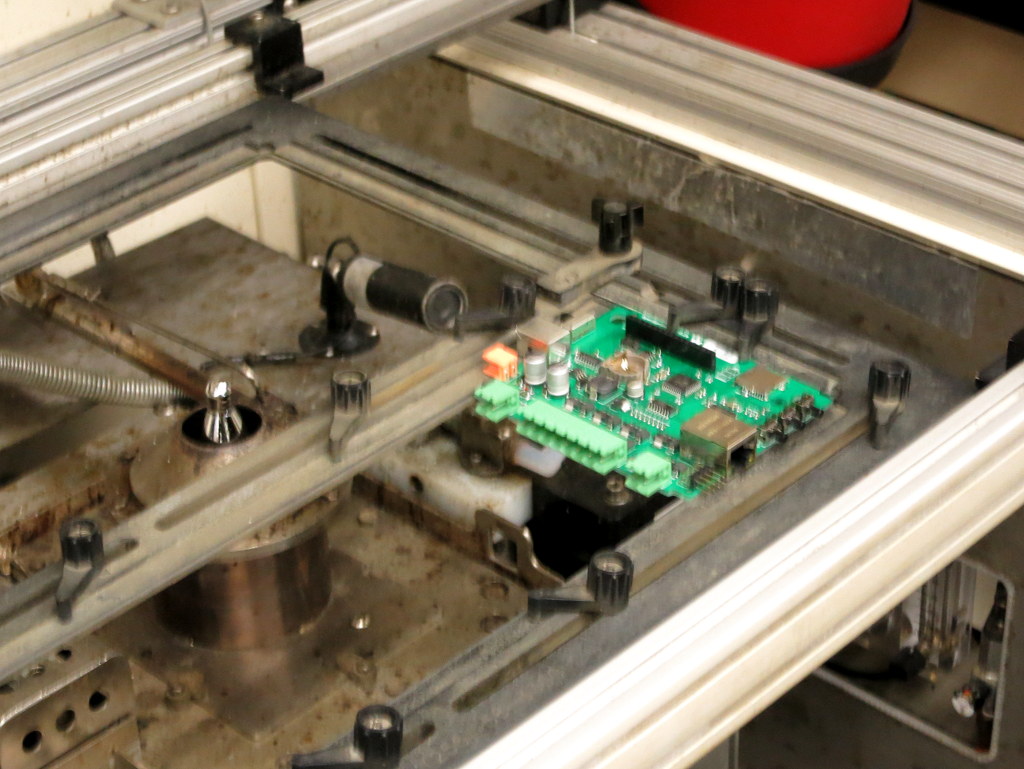
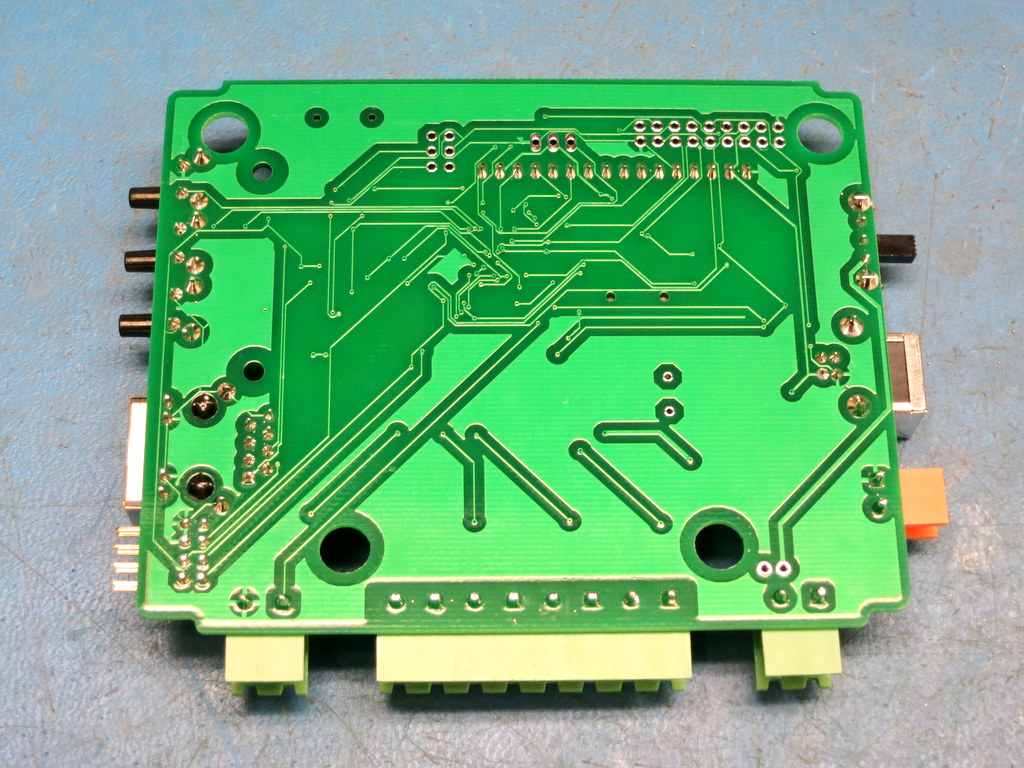
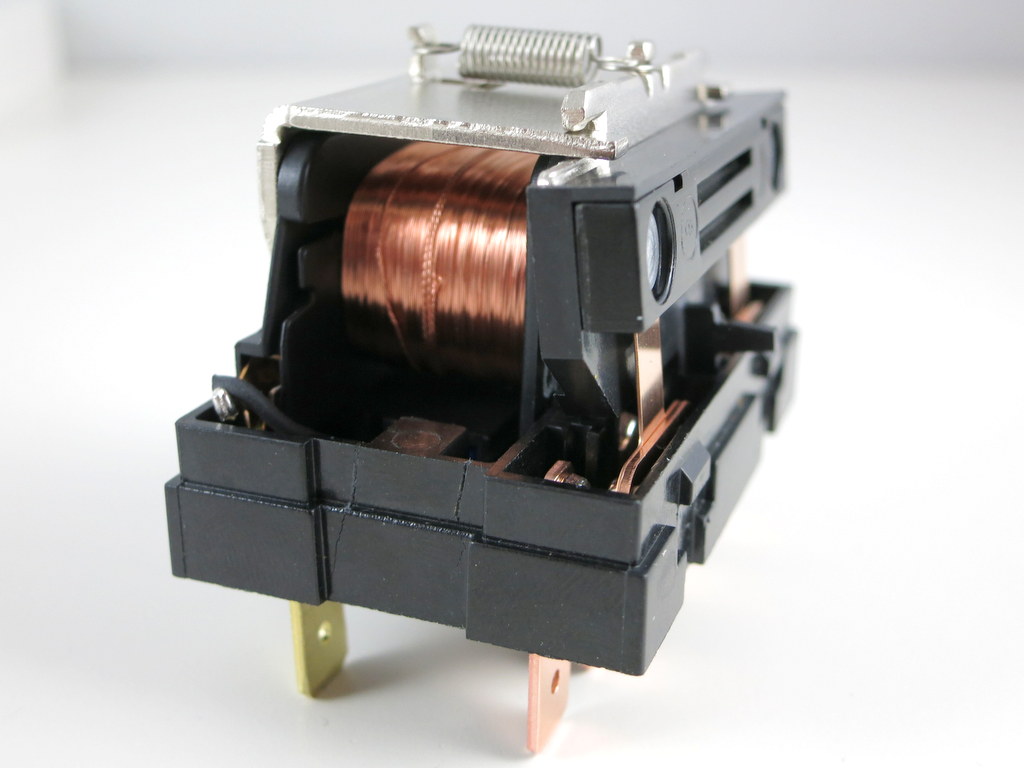
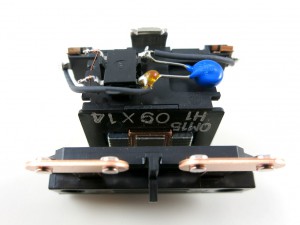
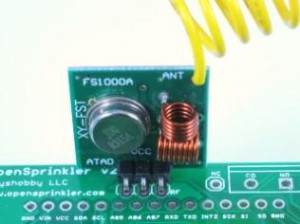
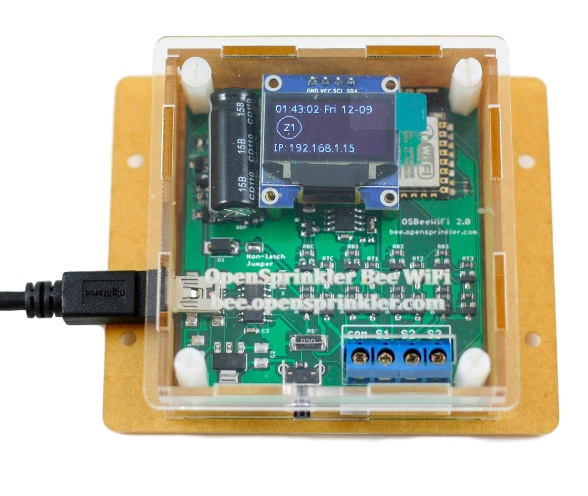
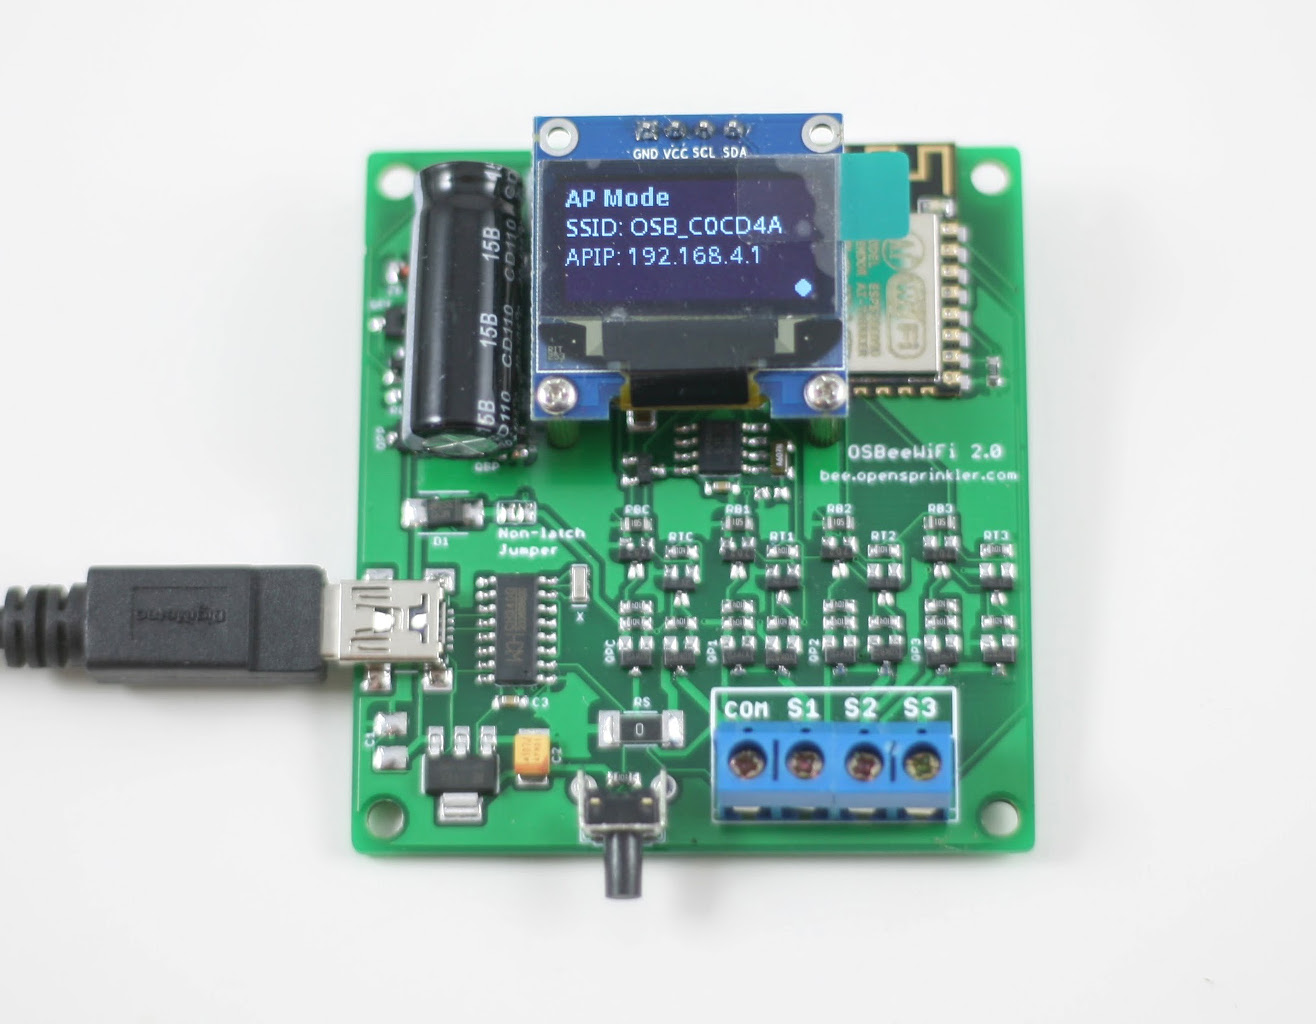
Here are two photos of the OSBee 2.0 circuit board:
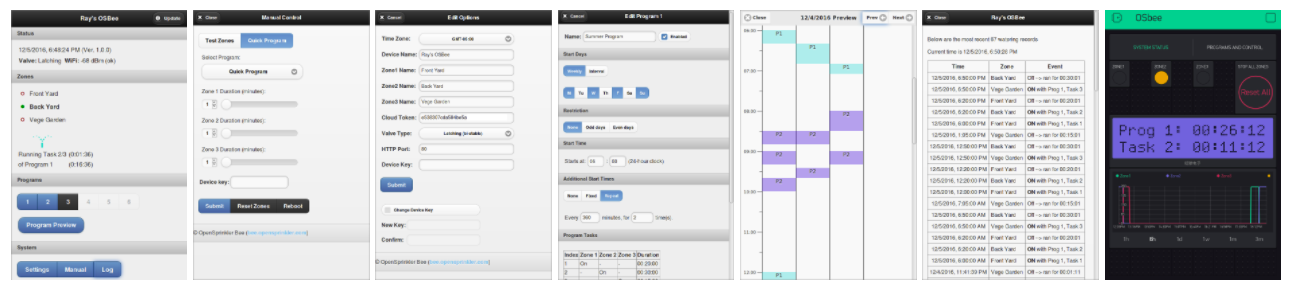
Screenshots of the web interface and Blynk app:
In summary, in terms of Hardware Design, it has the following features:
- A single ESP8266 chip serves as the microcontroller and handles WiFi connectivity.
- On-board 128×64 OLED display, real-time clock with backup battery, USB-serial chip. Can switch up to 3 zones independently.
- Boost converter and a new H-bridge design that allows the same controller to switch both lathing and non-latching solenoid valves, all powered from a single 5V USB port.
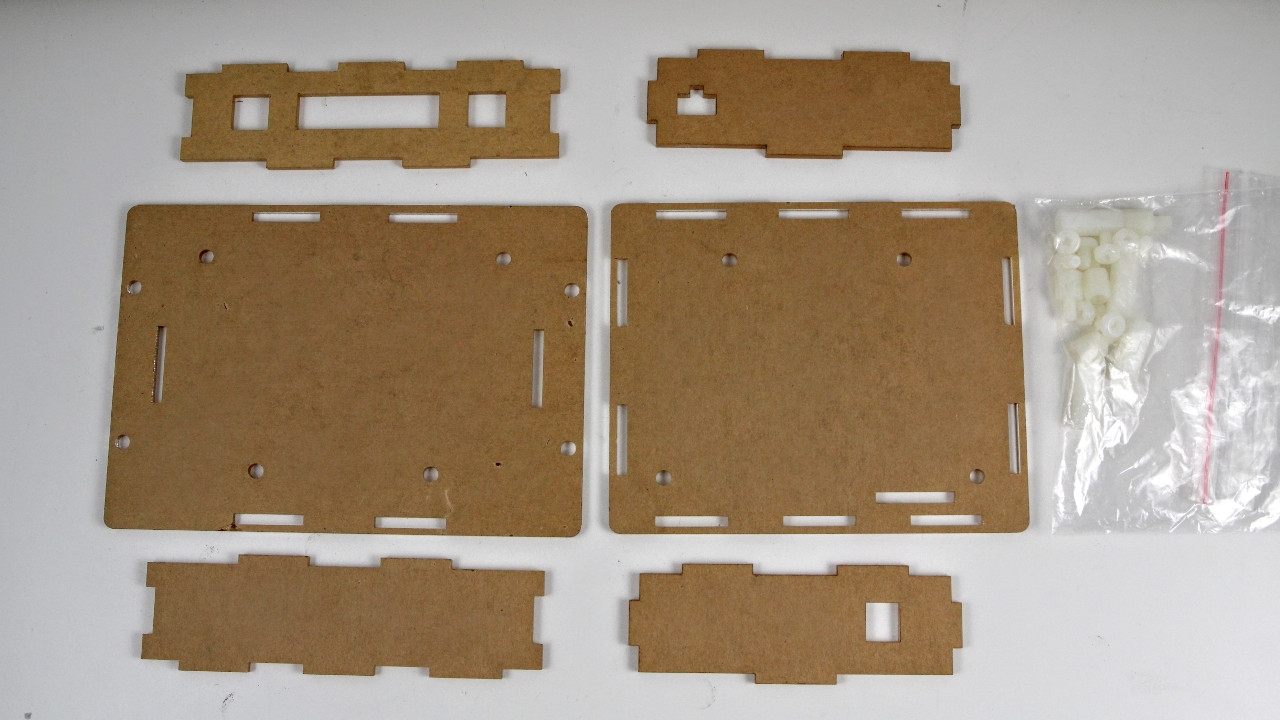
- An easy-to-assemble laser cut acrylic enclosure.
In terms of Software Features:
- It has a built-in web interface that allows you to easily change settings, perform manual control, and create automatic sprinkler programs. It also provides logging and program preview features.
- It introduces Program Tasks to allow maximal flexibility in programming zones. For example, you can define arbitrary ordering of zones, have multiple zones run at the same time, and insert delays between tasks. Zone water time is programmed at precision of seconds.
- It allows remote control through the Blynk app and Blynk cloud server.
- Firmware update can be performed either wirelessly using the web interface (OTA), or through the on-board USB port with a USB cable.
It improves upon the current OpenSprinkler 2.3 by adding built-in WiFi capability, and using a unified solenoid driver that can handle both latching and non-latching solenoid valves. On the other hand, it can only switch up to 3 zones, and the number cannot be expanded. It’s also missing a few advanced features at the moment, such as weather-based water time, virtual stations (e.g. HTTP and RF stations), and support for sensors. Some of these features are purely software, and can be easily added in the future.
OpenSprinkler Bee 2.0 is now available for purchase at our online store:
The package includes a fully assembled OSBee 2.0 circuit board, laser cut acrylic enclosure, instructions, USB cable, and optionally an USB adapter.
Resources and Technical Details
OSBee 2.0 is an open-source project. Its hardware schematic, firmware source code, user manual, and API document are all available at the OpenSprinkler Github repository (look for the prefix OSBee in the repository).
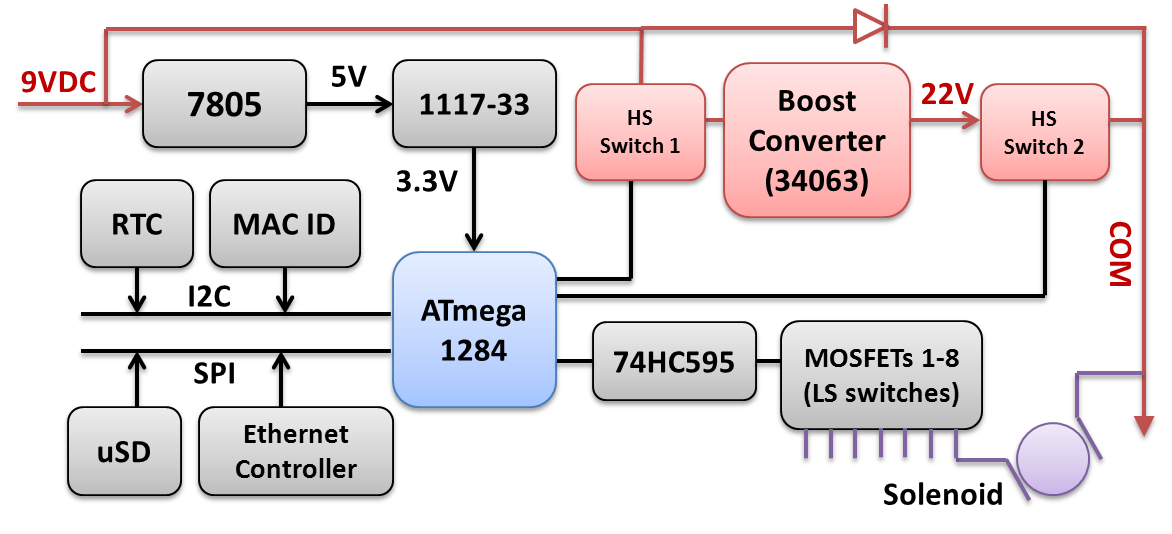
Below I will briefly go over the technical details of the boost converter and the solenoid driver, as I think it’s an interesting design that’s potentially applicable elsewhere. The boost converter is borrowed directly from the OpenSprinkler DC circuit. It’s a simple MC34063-based boost regulator that bumps the input 5V up to 24V DC, and stores the charge into a 2200uF capacitor.
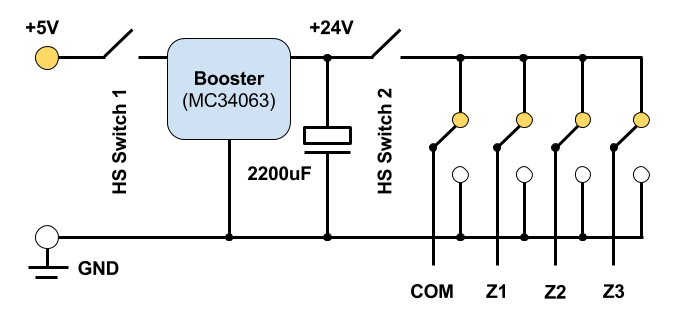
The Booster is controlled by two MOSFET-based high-side switches. The first one controls the input power: the microcontroller uses it to feed the input 5V to the booster, which quickly raises the voltage to 24V. After a couple of seconds, high-side switch 1 is turned off and the microcontroller prepares the states of the half H-bridges (COM, Z1, Z2, Z3). Let me first explain how the states are set for Latching solenoids. The solenoids for the three zone are connected between COM-Z1, COM-Z2, and COM-Z3 respectively. Normally all four half bridges are in ‘High’ state, so the net voltage across every solenoid is 0. To activate a solenoid (say Z1), the corresponding half-bridge will be pulled down to ground (i.e. ‘Low’ state). The microcontroller then turns on high-side switch 2 momentarily to dump the charge from the 2200uF capacitor to the solenoid. This turns on the valve. To deactivate the solenoid, the microcontroller pulls all half-bridges to Low, except the zone that is to be deactivated which remains in High state. It then turns on high-side switch 2 momentarily, again dumping the capacitor charge to the solenoid, but now in reverse polarity, thus closing the valve. This is basically how it operates latching solenoids.
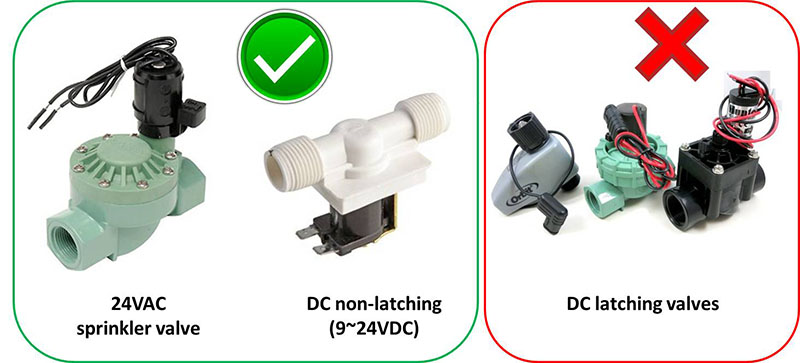
So how does the same circuit work for Non-Latching Solenoids, such as 24VAC valve commonly used in residential sprinkler system? It turns out that just like latching solenoids, non-latching ones also require a pretty high impulse current (called inrush current) to get activated. The difference, however, is that to keep it on, it needs to draw current continuously from the power source. When the power cuts off, the solenoid is deactivated. This is called the holding current and is considerably lower than the inrush current. So to operate non-latching solenoids, all I need is an additional diode that provides a path from the input 5V to the solenoids to provide the holding current. This diode could be software switched by the microcontroller, but because ESP8266 has very few number of GPIO pins, (and I want to avoid having to use an IO expander), I opted to enable this diode path using a solder jumper. To operate non-latching valves, this jumper needs to be soldered on.
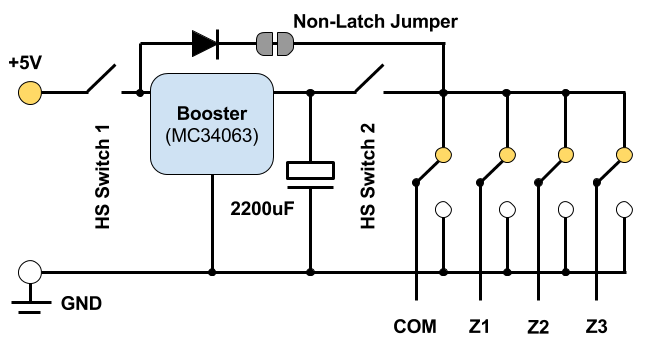
On the Software side, the firmware uses an option to allow the user to choose the valve type (unfortunately the controller can’t automatically detect the valve type yet). For non-latching valves, the half-bridge states are actually easier to manage than the latching case: now COM is always in ‘High’ state, and Z1, Z2 or Z3 are kept ‘Low’ for as long as needed to keep the valves on. That’s it.
You may be wondering how does this even work for valves rated at 24VAC? How can we drive them using DC, and just 5V? The short answer is that this is due to the way such solenoids behave under AC. Specifically, when you first connect the solenoid to 24VAC, it immediately draws a high inrush current, which reliably energizes the solenoid and opens the valve. Once energized, the solenoid presents a large inductance and high reactance to AC, thus limiting the effective current flowing through it. This results in lower holding current, which is enough to keep it on and saves the coil’s lifespan. We can exploit this behavior and achieve the same effect using a DC-based circuit: the booster produces a high voltage initially to provide the inrush current needed to energize the solenoid, and then lowers the voltage to the input level to provide the holding current. Exactly how much holding current is needed is not clearly defined, but for all 24VAC solenoids I’ve tested, once energized, they can remain on at just 5V input voltage.
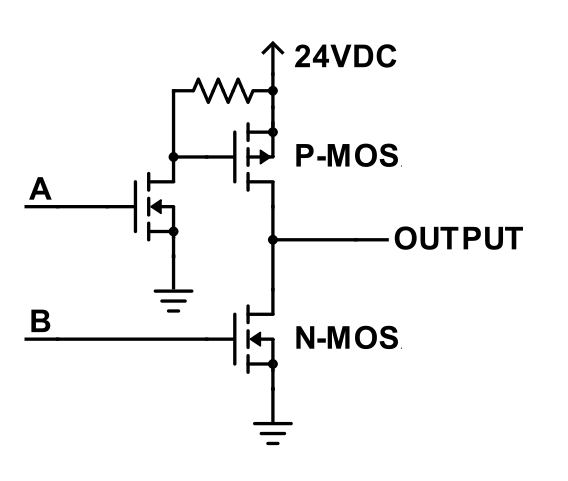
Now we are left with the last part of the technical details: the Half H-Bridge Design. From the circuit diagram above, it seems we can easily implement the half bridges using relays. While this is totally true, relays are bulky, expensive, slow to switch, and difficult to replace. For these reasons, modern electronics prefer to use semi-conductors as much as possible in place of relays. So I decided to use a MOSFET-based H-Bridge design, and it’s a more interesting design than just throwing relays everywhere.
Typically when you want to switch between GND and a voltage considerably higher than the microcontroller’s output, you can use a half H-bridge design as show in the left image below. It uses a low-power N-MOSFET to drive the high-power P-MOS on the bridge, making it possible to use a GPIO pin to switch a high voltage. However, this generally requires 2 GPIO pins (i.e. A and B) per half bridge. Because ESP8266 has a small number of GPIO pins, the challenge is how to use just 1 GPIO pin per half bridge.
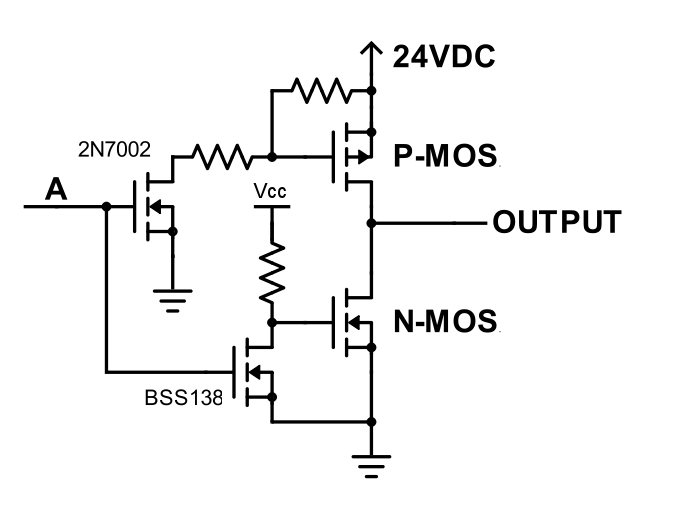
So I came up with a slightly modified half bridge design, as shown in the right image above. It leverages two low-power N-MOSFETs to drive the high-power P-MOS and N-MOS on the bridge. This allows using just 1 GPIO pin (A) to switch the bridge. When A is Low, both input N-MOSFETs turn off, and the gates of the P-MOS and N-MOS are both pulled high, so the P-MOS turns off and N-MOS conducts, pulling the OUTPUT to Low. When A is High, the reverse happens, and the OUTPUT is also High.
Using two input N-MOSFETs also makes it easy to prevent shoot-through problem, which is often an issue with H-bridge. Shoot-through happens when the control signal A transitions from Low to High (or conversely from High to Low), and at some point the P-MOS and N-MOS may both be in conducting state, causing a shorting. To avoid this, I chose to use two different types of input N-MOSFETs: one with lower gate threshold voltage (such as BSS138) and one with higher gate threshold voltage (such as 2N7002). This way, as the control signal A swings between Low and High, the two input N-MOSFETs will turn on and off at different times, ensuring that the P-MOS and N-MOS will not both conduct at the same time. As for the choices of the P-MOS and N-MOS, I opted to use the common AO3401 and AO3400, which provide ample room for continuous current as well as impulse current.
Sorry about going through these nitty-gritty details, but I think these are interesting design notes worth documenting and sharing. Feel free to chime in with your comments and suggestions. Thanks!