OpenSprinkler › Forums › Pictures and Creative Use › OpenSprinkler – Central Australia Setup
- This topic has 3 replies, 2 voices, and was last updated 2 years, 6 months ago by
Ray.
-
AuthorPosts
-
January 8, 2024 at 4:12 am #77870
saimParticipantHello everyone, greetings from Australia.
First up I just wanted to thank everyone involved in the development and maintenance of OpenSprinkler. It is fantastic – one of the best open source projects I’ve ever seen. Having recently spent the holidays revamping our home watering setup I wanted to share some photos and details that may help others thinking about using OpenSprinkler.
A number of photos and a circuit diagram are attached to this post.
My wife and I have been intending to upgrade our watering system for many years now. We live on a 1/4 acre block with over 100 fruit trees, large veggie patch, flower beds and various pot plants.
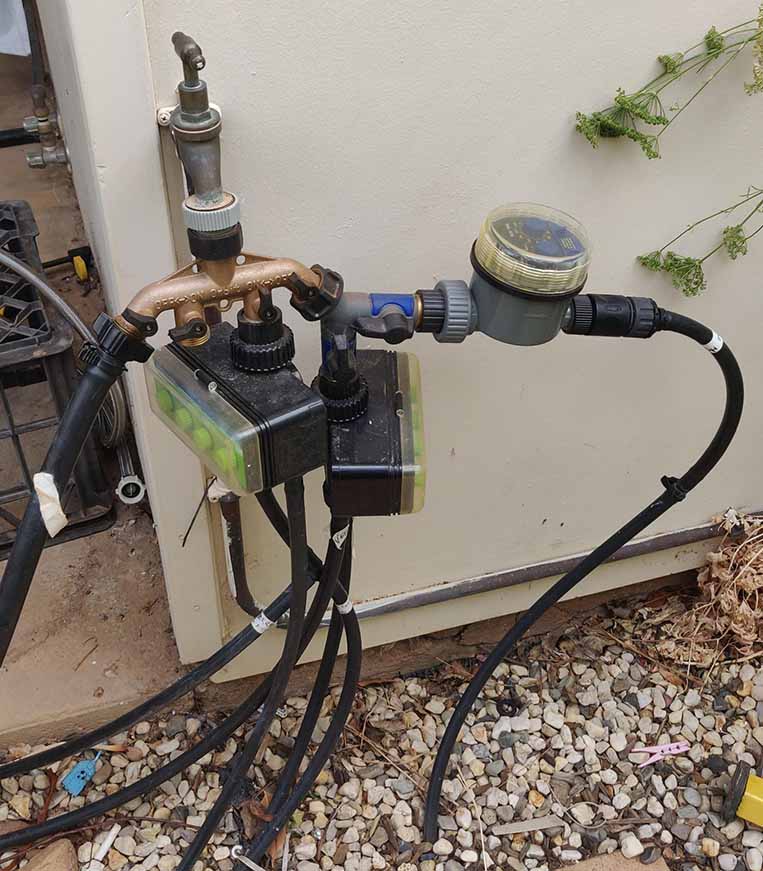
Our sprinkler system is made up of 13mm poly pipe with drippers. This has grown into 9 circuits over the years. To connect them we have been using a 4-way tap manifold and multiple battery tap timers (see photo) on one the back garden tap. My wife says I have to mention the photo is inaccurate as there was another double tap timer attached to that setup. On the other tap out the front, it had a splitter and yet another double tap timer. This had grown out of hand and difficult to manage. If any batteries went flat you would find out about it a week later as the plants were droopy and unhappy. We also found the build quality of the battery tap timer to be quite poor, this resulted in at least one failing per year and they cost about $100 each. They were also difficult to know when each circuit ran, so there were at times overlapping of systems running as well as watering in the heat of the sun – not ideal!
So we decided to upgrade to solenoids but couldn’t choose an irrigation controller that suited the growing garden’s needs – enter OpenSprinkler!
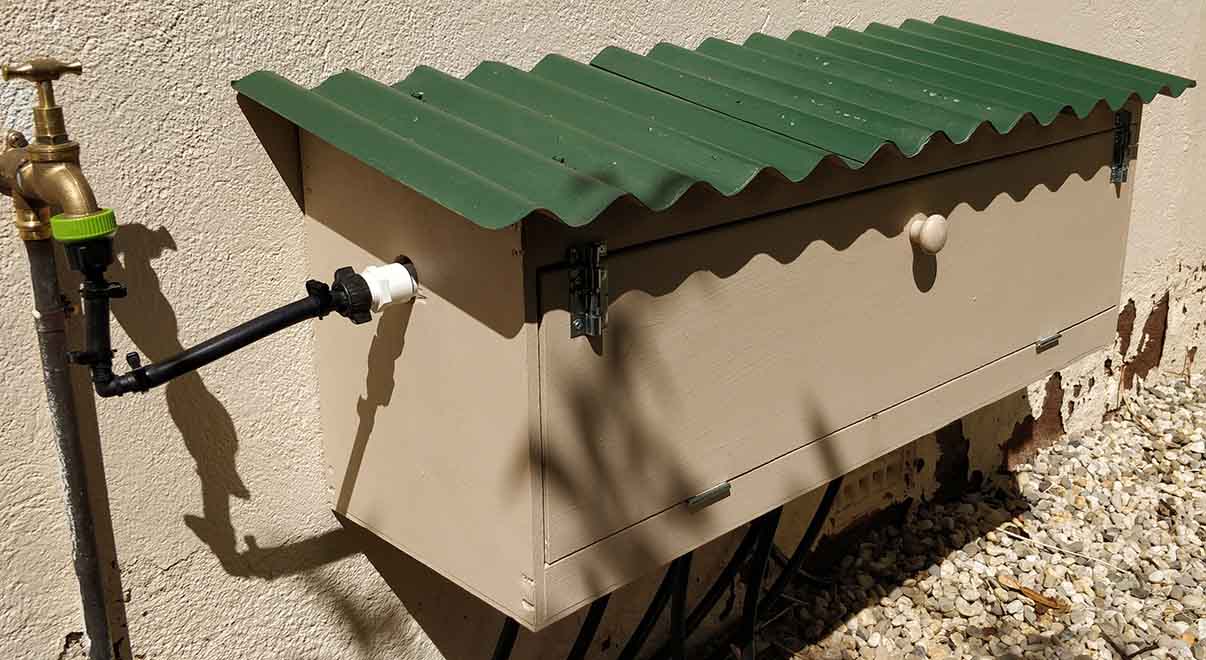
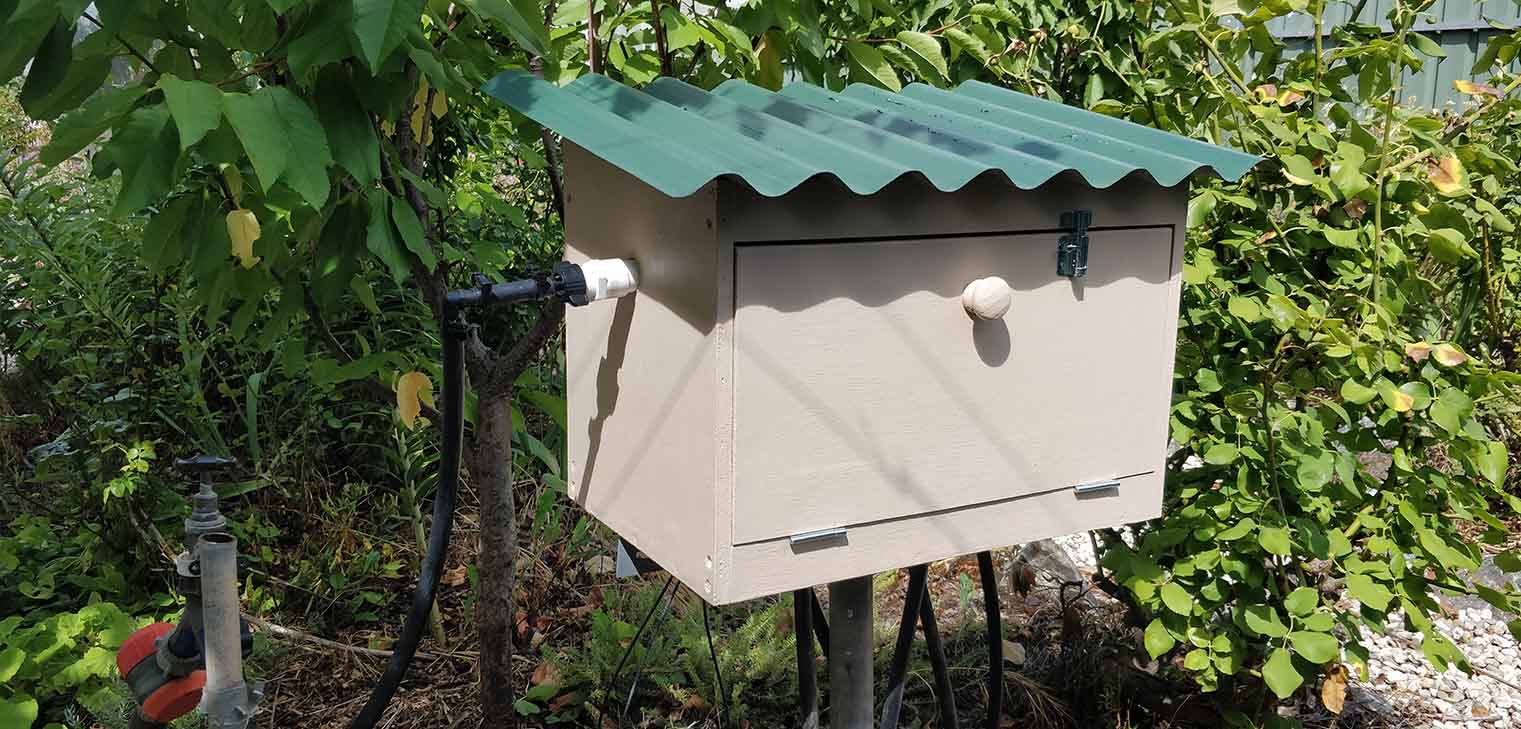
This holidays we removed the old tap timers and replaced them with two custom built outdoor boxes to house the solenoid valves and wiring. I wanted them above ground to protect the solenoids from rain and particularly the outback sun. As our water poly pipe systems were already in place we could direct the back garden circuits to a 10-station house and the front garden to a 4-station house (affectionately known as the “bird house” or “teddy’s cubby house” by my youngest daughter).
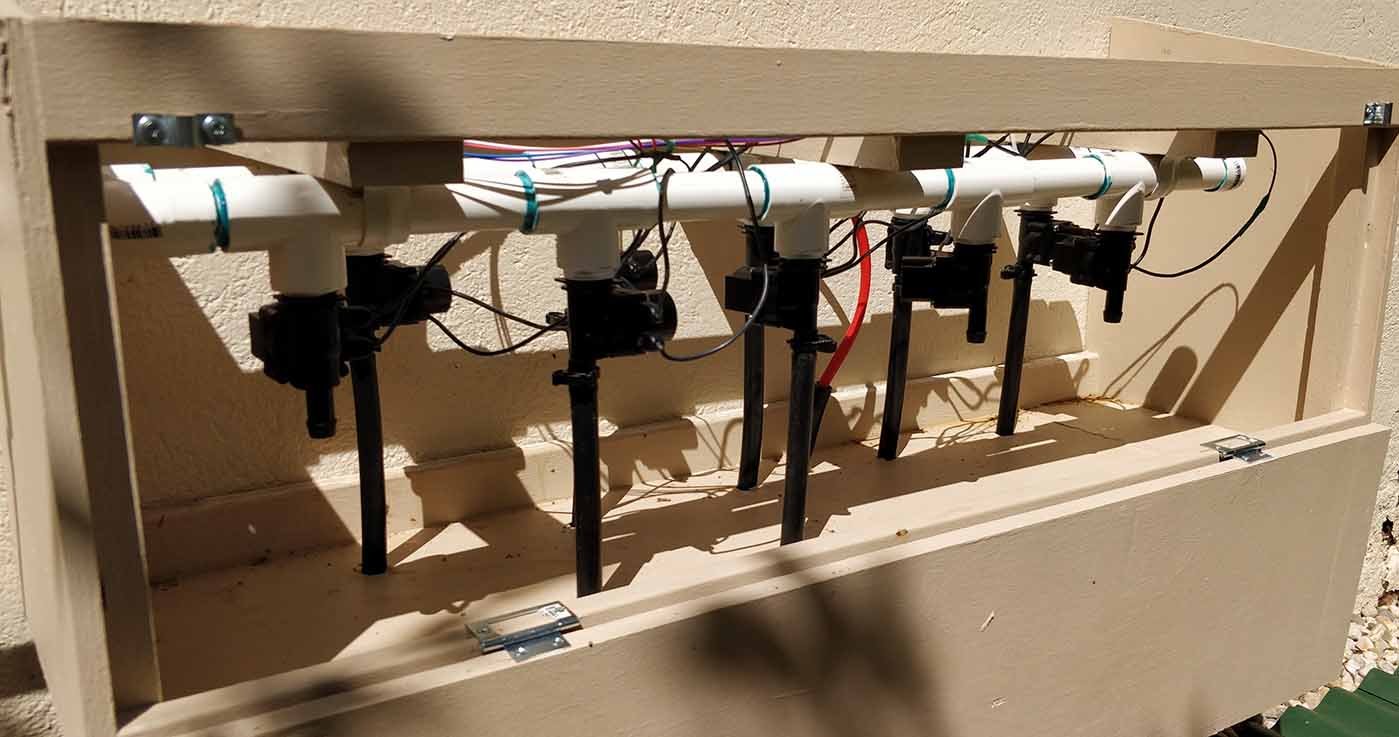
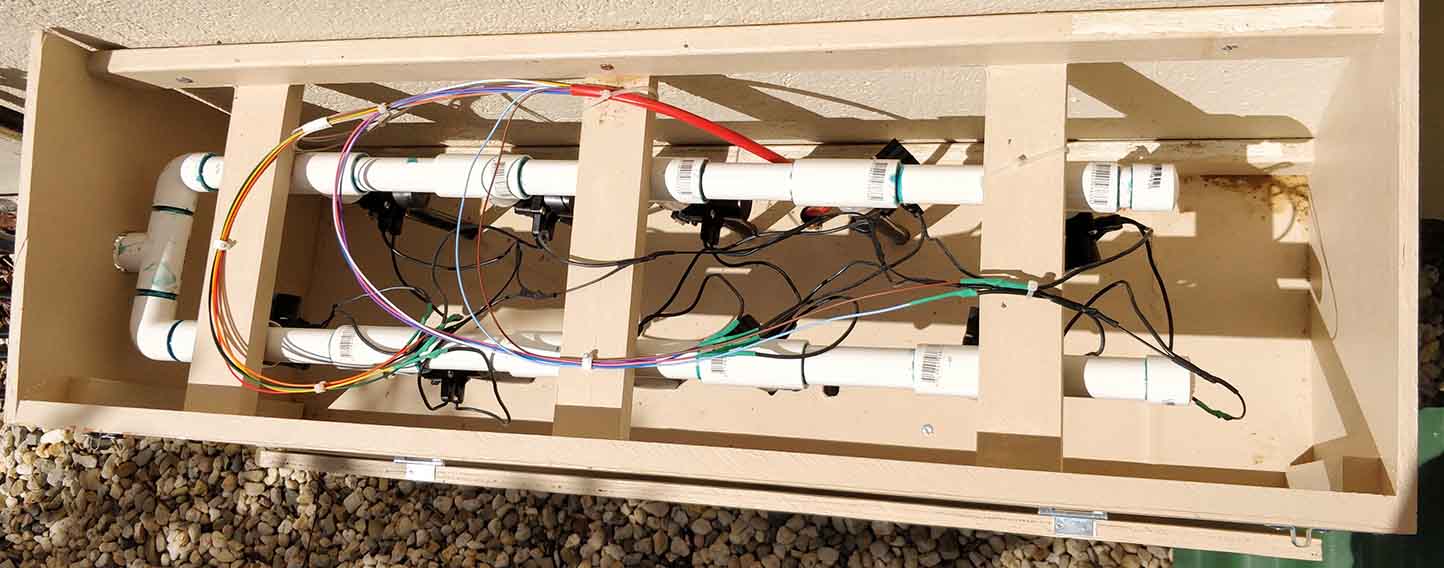
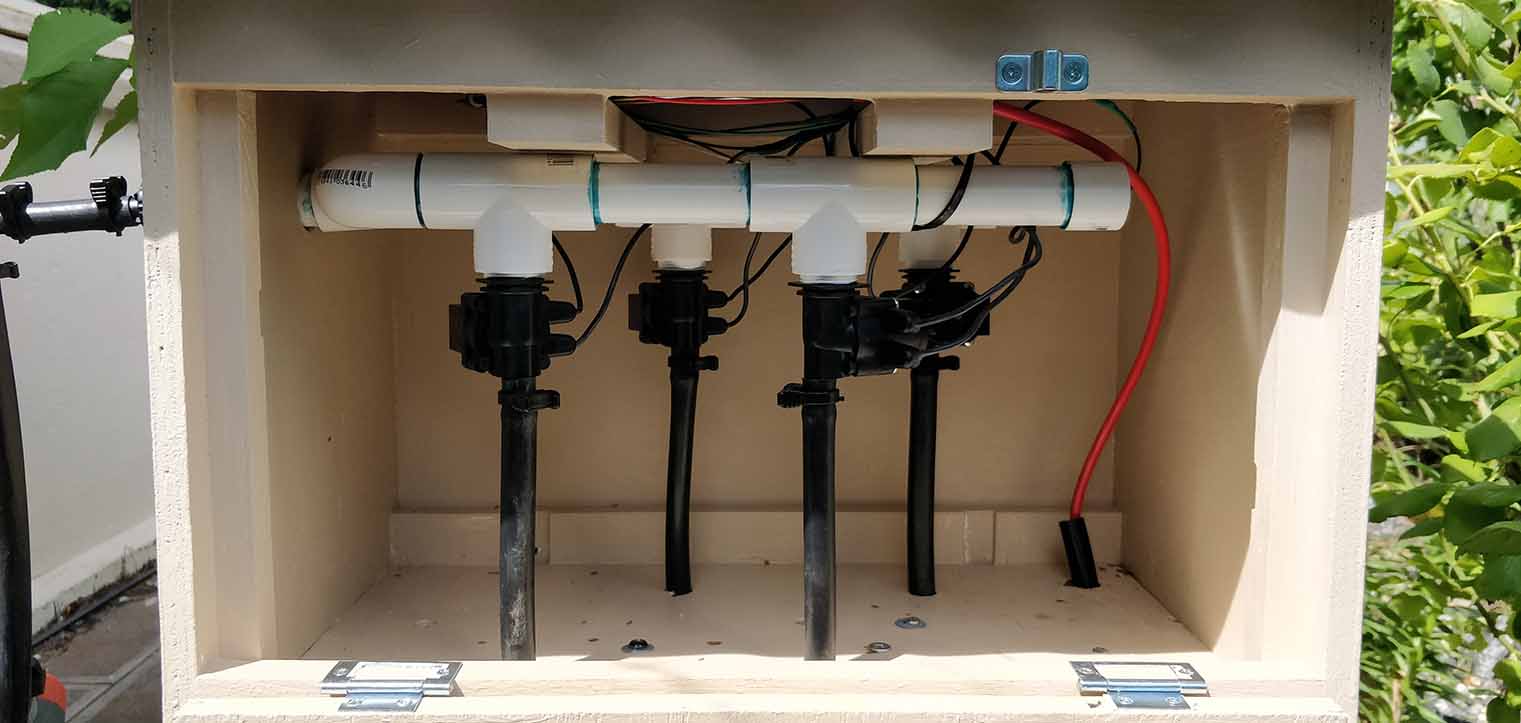
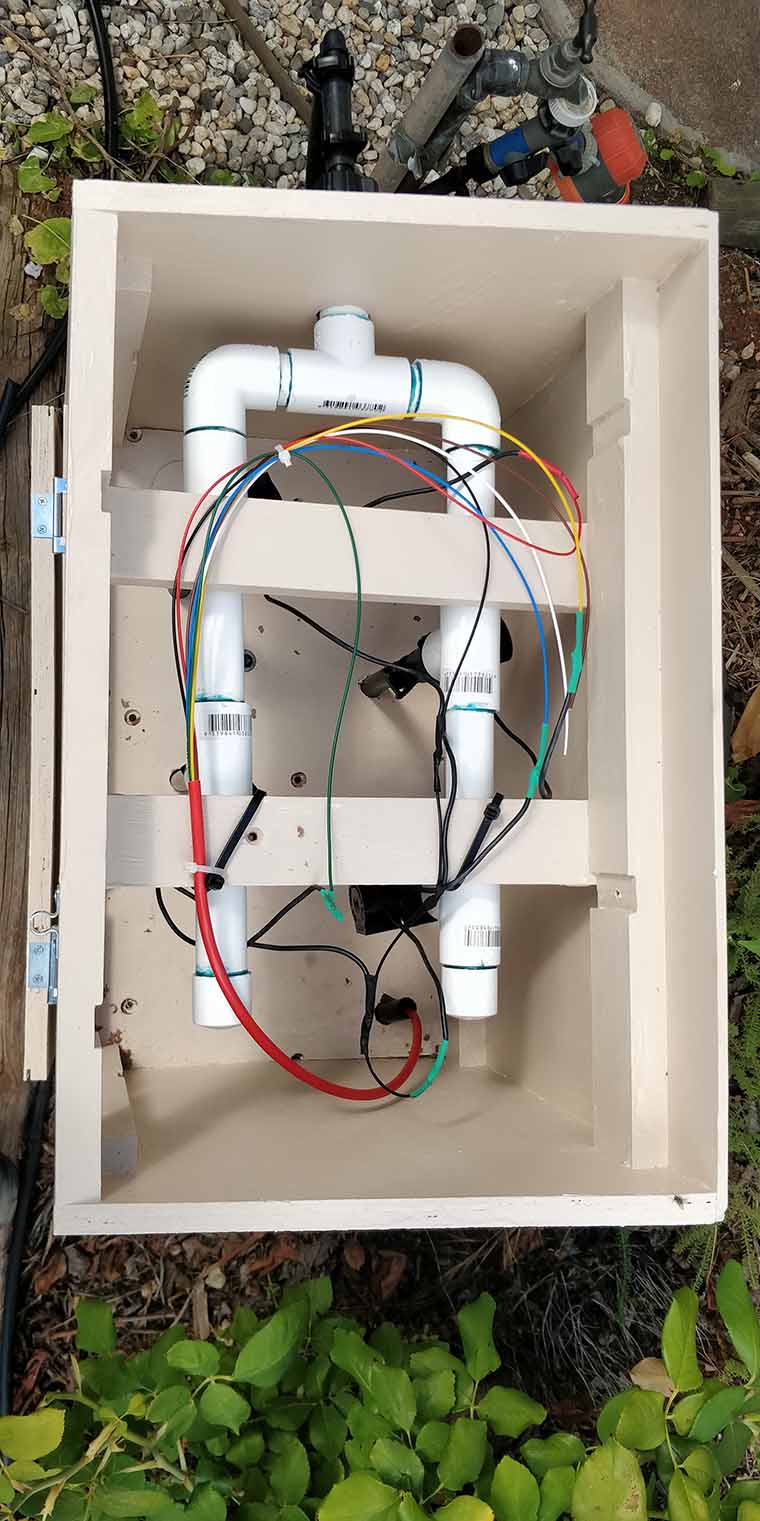
Each box is made of packing ply (very low cost plywood) and corrugated iron (classic Australian building material). Inside the boxes is a manifold made from 20mm PVC pressure pipe. This costs roughly $2 per piece (connected, tee joiner, straight, etc) from the local hardware. We used 3/4 inch BSP thread tee joiners as our solenoids are 3/4 inch BSP to 13mm barb to suit the existing poly pipe dripper circuits. So the solenoids just screw into the joiner with a bit of thread tape. This also makes them easy to swap out for future maintenance. The lids of the boxes are removable for easy access to wire connections and inspection.
Irrigation wire was run from inside our home (study) to each outdoor box. A 13-core wire to the large box and a 7-core wire to the “bird-house”. This allows for future growth of 1 extra solenoid inside each box – enough space was left inside each box for a future tee joiner at the end of the PVC manifold.
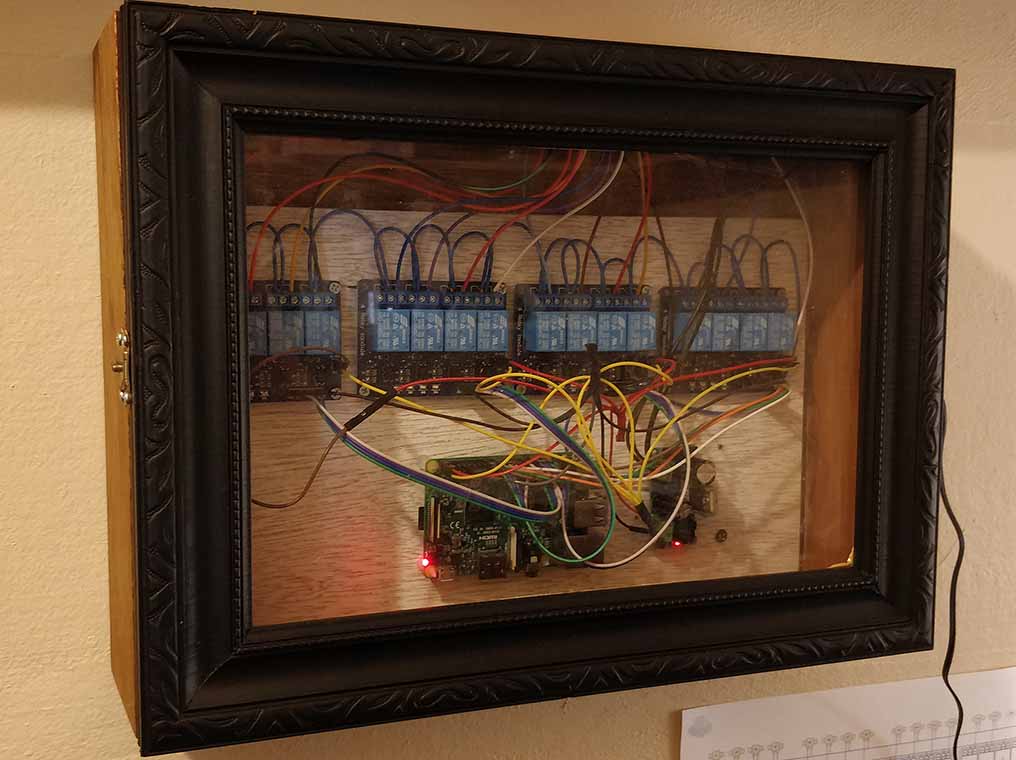
Inside the study is where the electronics is housed in a plywood box, with old picture framing material and a perspex screen. Mounted on a painted plywood board is the OpenSprinkler setup.
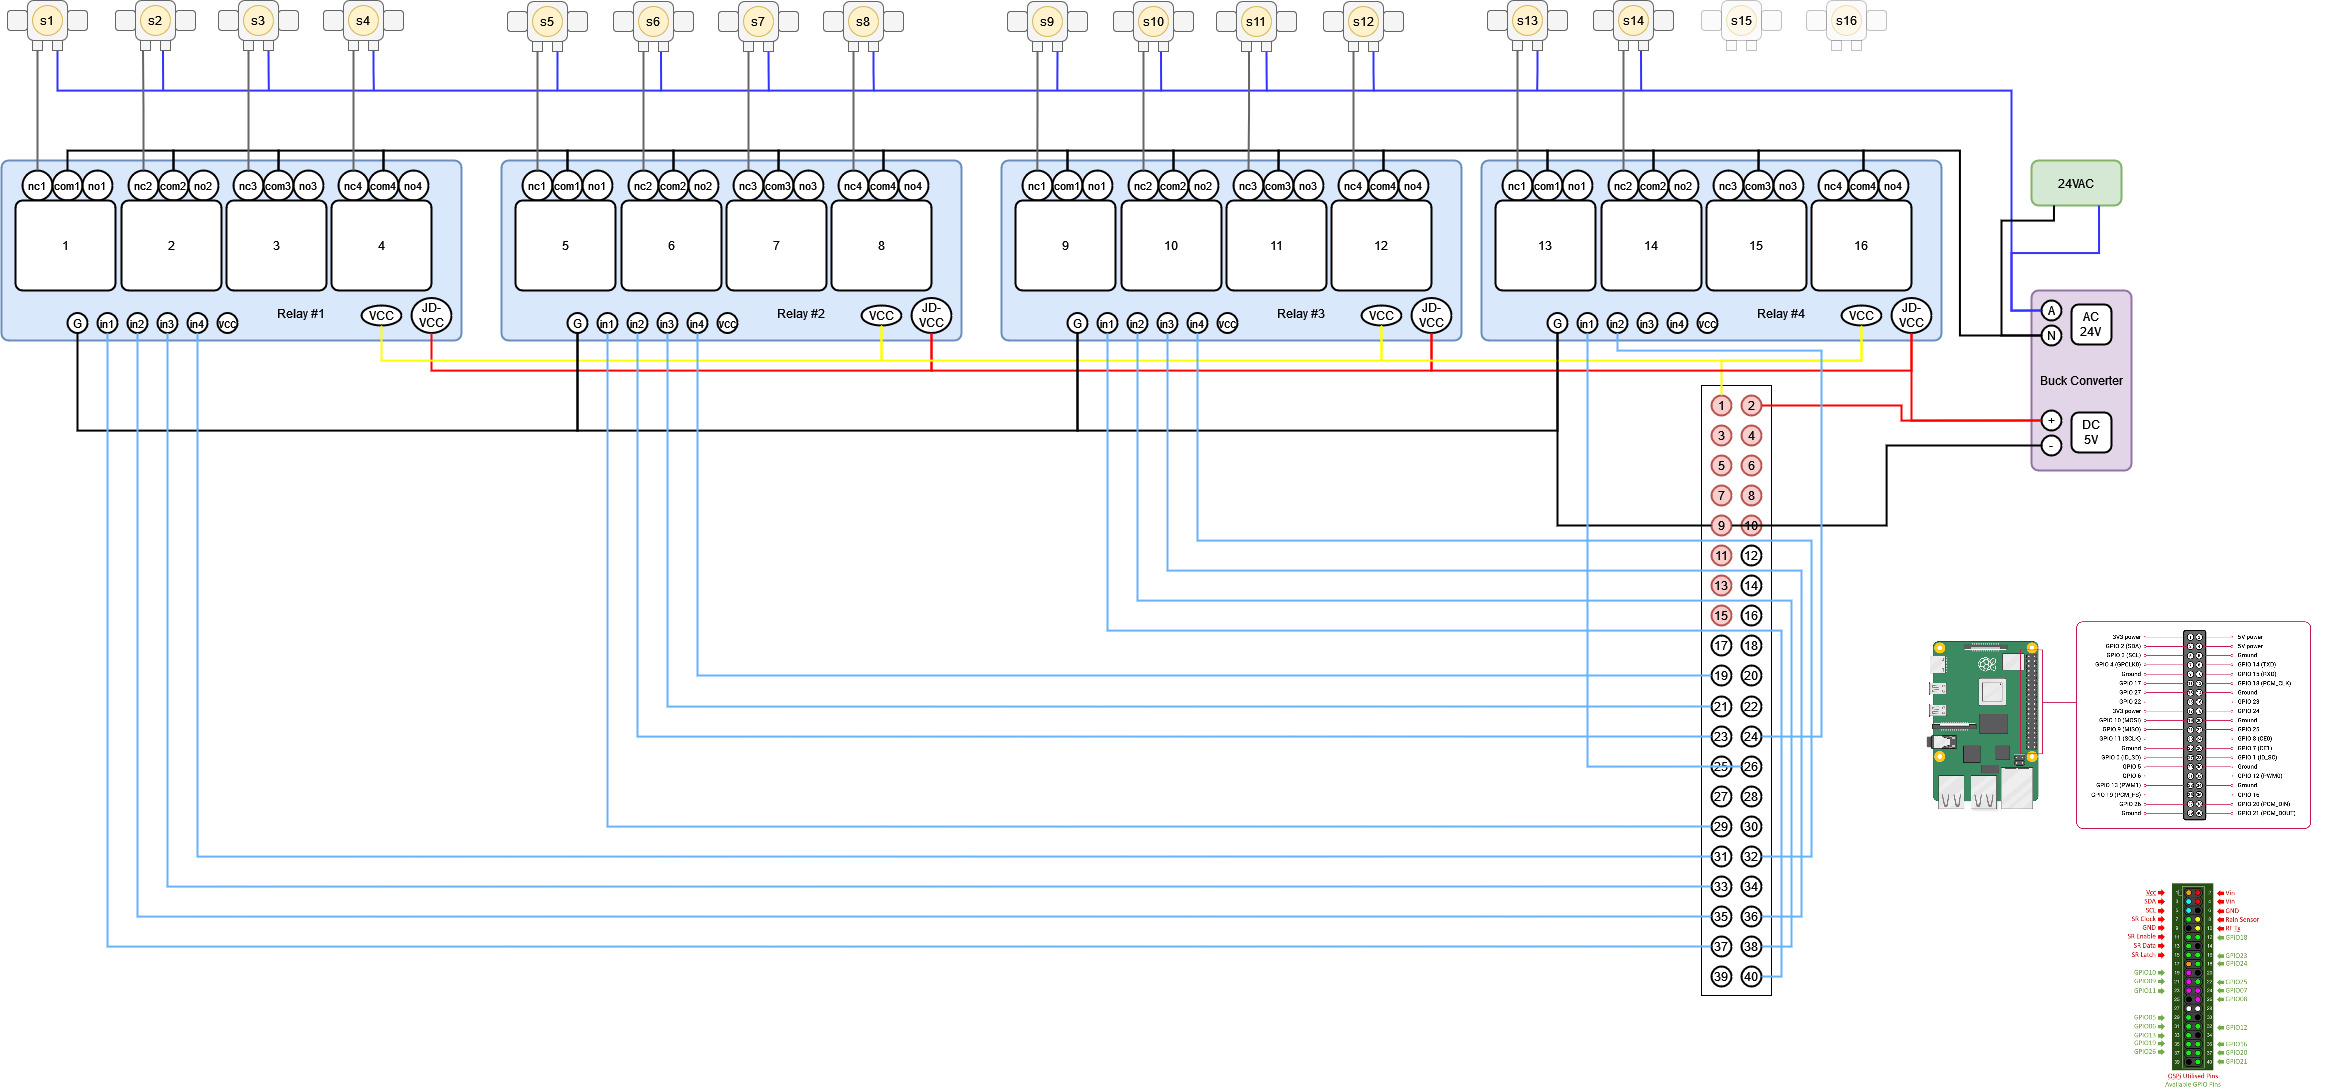
I had an RPi3 and Pi Zero W in my box of ‘tinkering things’, and decided on the RPi3 to get setup with the Pi Zero W as a backup if needed. The relays were purchased online, as was the AC/DC to DC Buck converter which allows the 24VAC solenoid feed to also power the RPi3 and the relays (Buck converter output was set to 5.1V). The 24VAC power supply was purchased at our local electronics shop. The RPi3 signal circuit is 3.3V which is sent to the input pins on the relays. A friend and colleague of mine suggested using 4 separate relays rather than two big 8-ways or a 16-way relay board as it has allows redundancy – if one of the relay board dies, the other 3 should continue to work and keep most of the garden going. The circuit diagram is attached for more details. Note the pinouts (40) for the RPi3 and Pi Zero W are the same. Big thank you to Mark S on YouTube for the idea and explanation: https://www.youtube.com/watch?v=YAo5GbUAF94
I really liked the idea of using OSPi, which is very well designed and built. What I’ve ended up with was the fastest and cheapest way to get up and running during the Christmas/New Year time, but inferior to the OSPi product. I only discovered OpenSprinkler in early December (1 month ago) and moved quickly once realising this solution is viable and the holidays are limited.
We now have all 9 poly pipe watering circuits connected, and by splitting some of them up we have increased our total watering circuits to 11. In the coming days we will attach the 12th system which will be a 15 second sprayer circuit to our seed trays. OpenSprinkler gives us control down to the second, so we want to spray the seed trays 4 times a day for 15 seconds. Our previous seed trays always suffered in the outback summer heat. This leaves us 2 spare solenoids for now, wired and ready.
This was a very enjoyable holiday project as it involved woodwork, metalwork, PVC plumbing, wiring, soldering and a chance to wire up an RPi into a circuit for the first time. Prior to this I have only used the Pi for software solutions.
OpenSprinkler was straight forward to install and incredibly flexible. The ability to change each to station to a pinout on the pi is excellent. We now use the app on our Android phones and also have the web app bookmarked on the home computer.
The system has been operating for about 2 weeks now and so far it is rock solid. I have been thinking about adding a circuit breaker (thermal?) on the common 24volt line in the case of a solenoid malfunction or short. There are some posts on the forum that have discussed this, but the electronics side of things is not my forte.
I would like to contribute to this open source project in some way, perhaps this information is helpful to someone in the community. Happy to share more building photos and designs, or a detailed parts list if that is of use to anyone.
January 8, 2024 at 4:13 am #77875
saimParticipantBird-house photos attached.
January 8, 2024 at 4:22 am #77879
saimParticipantPhotos of the board and circuit diagram.
January 9, 2024 at 9:15 am #77892
RayKeymasterAwesome! I like the detailed description and the pictures. Thanks for sharing!
-
AuthorPosts

- You must be logged in to reply to this topic.
OpenSprinkler › Forums › Pictures and Creative Use › OpenSprinkler – Central Australia Setup