Security+ 3.0: What It Is and How to Use It with OpenGarage

If you have recently shopped for a new Chamberlain or LiftMaster garage door opener, you might have noticed a new term: Security+ 3.0. While “new and improved” usually sounds good, this latest update has thrown a wrench into the smart home community. Here is a breakdown of what is going on, why your existing gadgets might not work, and how we can help you get OpenGarage running on these new units.

What is Security+ 3.0?

Released in November 2025, Security+ 3.0 is the latest encryption protocol from Chamberlain Group (which owns Chamberlain, LiftMaster, and Craftsman).

  • How to spot it: These openers feature a White Learn Button (previous generations used Yellow, Purple, or Red/Orange). Some example models are: Chamberlain D1000, LiftMaster 2220L.
  • The Big Change: Unlike previous versions that communicated via wired data lines, Security+ 3.0 moves accessory communication to encrypted Bluetooth Low Energy (BLE). The wall button wires now provide only power, with no data signal to tap into.
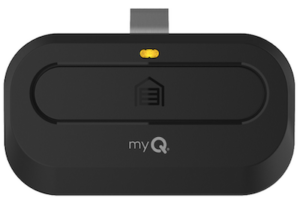
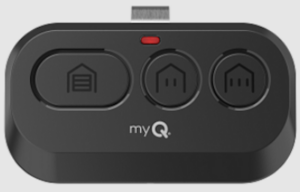
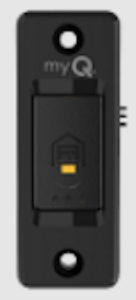
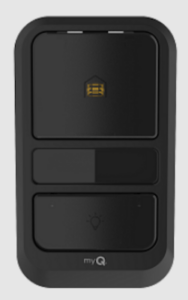
  • The remote and wall button that come with these systems look like the images below.

The Problem: The “Closed” Ecosystem

Because the new protocol relies on encrypted wireless communication, no third-party gadgets currently support it natively. RatGDO, Konnected, Tailwind, you name it, none supports it.

  • Devices that worked on Security+ 2.0 (like RATGDO) generally cannot control these new units directly.
  • Chamberlain has aggressively moved toward a closed “myQ” ecosystem, locking out local control integration in favor of their cloud subscription model.
  • The Bottom Line: It is unlikely that native third-party support will arrive anytime soon.

The Solution: The “Sacrifice Remote” Method

If you have a Security+ 3.0 opener and want to use OpenGarage (or any third-party/open-source controller), there is a reliable workaround. It is the same trick we used for Security+ 2.0 before our native support arrived: Switching the button on a dedicated remote.

Instead of wiring OpenGarage to the motor unit directly, you wire it to a spare remote or door button that is paired to your door.

  1. The Concept: You solder two wires to the button contacts inside a spare remote. We have a guide on how to do so.
  2. The Connection: Connect those wires to the OpenGarage relay terminals.
  3. The Result: When OpenGarage “clicks,” it electrically simulates a button press on the remote. The remote then sends the encrypted Security+ 3.0 signal wirelessly to open the door.

This bypasses the new encryption entirely by using Chamberlain’s own hardware to do the talking.

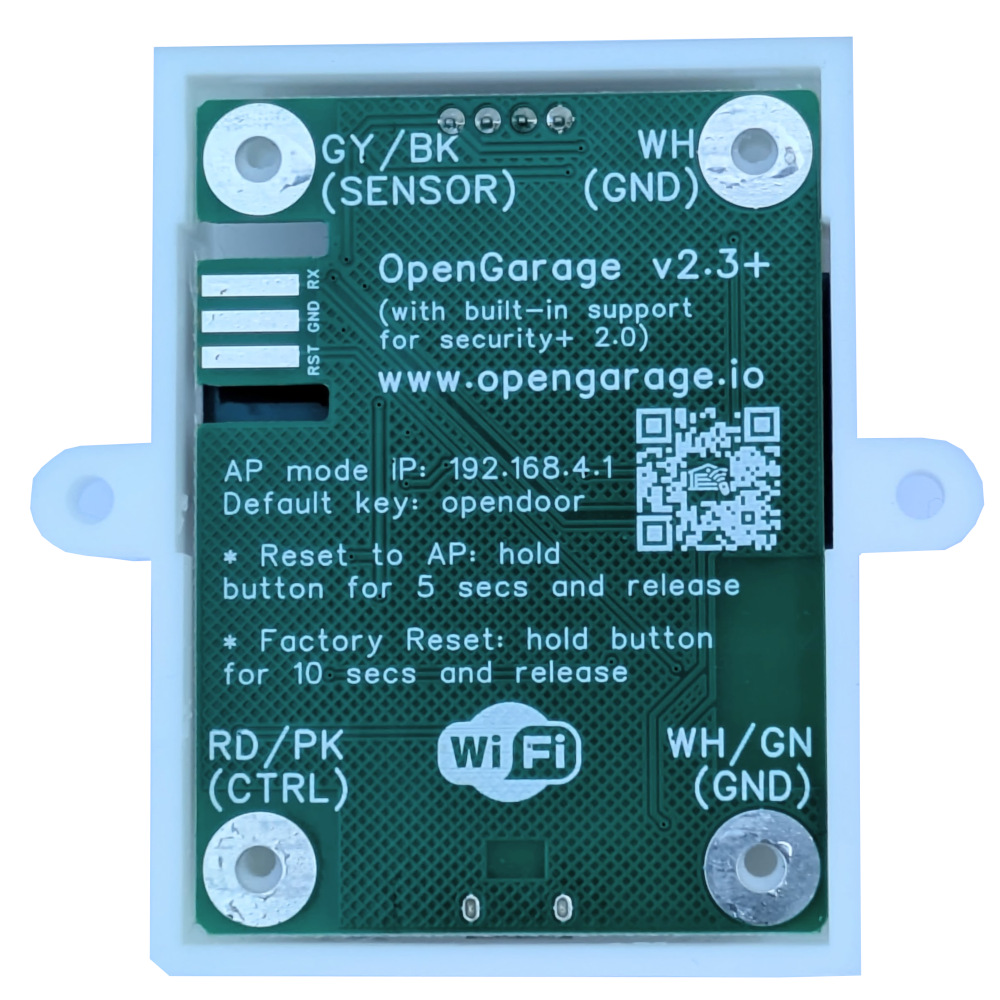
Configuration: When using this approach, you can either use the OpenGarage Classic Version (v2.2), or the newer v2.3+ with its ‘Security+ Version’ option set to ‘None’.

Limitations. The ‘sacrifice remote’ approach is a one-way communication. OpenGarage can send commands to trigger door actions, but it will not receive feedback or status updates from the remote.

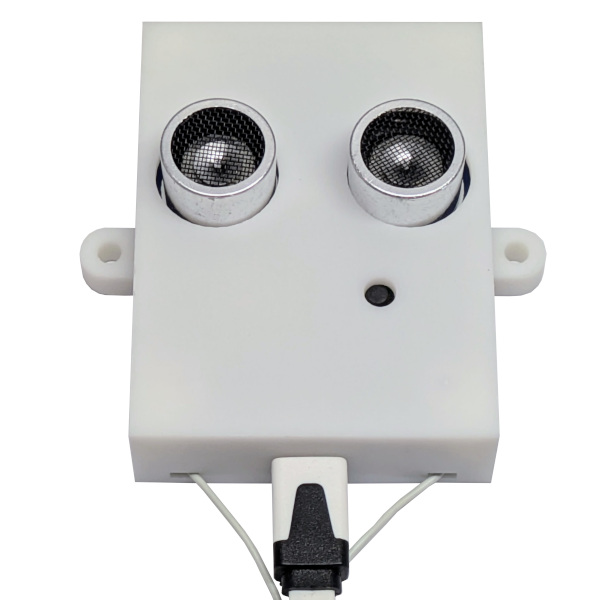
  • OpenGarage’s built-in ultrasonic distance sensor will still detect and report door status (open, closed, or in-between), so you’ll still have door position monitoring.
  • However, you will lose the ability to sense and control the garage light, as that requires two-way communication.

For most users, the ultrasonic sensor provides all the essential functionality needed for monitoring and controlling the door itself.


Free Soldering Service

We know soldering tiny wires onto a circuit board isn’t for everyone. We are happy to offer free soldering service for OpenGarage customers.

Here is how it works:

  1. Send us your remote along with a prepaid return shipping label
  2. We’ll solder the wires to the button contacts
  3. We’ll send it back ready to connect to your OpenGarage

Save on Shipping: To avoid paying for return postage, you can mail your remote to us before placing your OpenGarage order. Simply include a note inside the box letting us know it is for an upcoming purchase; or send us a support ticket indicating you will be mailing us a remote and hold on to your existing order. We will then ship the soldered remote back to you in the same package as your order, so no return label is required.

This ‘hardware bridge’ is currently the most feasible way to keep using OpenGarage with the latest Security+ 3.0 GDOs.


Introducing OpenGarage 2.3+

Exciting news! We’re preparing to release a new hardware revision of OpenGarage: version 2.3+. This will be the first OpenGarage to include native support for Security+ 2.0, eliminating the need for an external Security+ adapter. The hardware form factor is identical to OpenGarage v2.2, but with enhanced circuitry and software library courtesy of the open-source work of Ratgdo.

With this upgrade, OpenGarage can communicate directly with Security+ 2.0 garage door systems, enabling new capabilities such as reporting partially open status and controlling the opener’s light. Here’s a sneak-peek photo of version 2.3+:


FAQ

Q: What is Security+ 2.0?
A: Security+ 2.0 is a garage door opener technology introduced by Chamberlain around 2011 and sold under the LiftMaster, Chamberlain, and Craftsman brands. It uses rolling-code encryption for both remotes and wall button controls, providing stronger security and more reliable signals.

You can usually identify a Security+ 2.0 opener by its yellow “learn” button (and often a yellow antenna too). If you’ve purchased a garage door opener of the above brands in the last several years, there’s a good chance it uses Security+ 2.0. If you are not sure, take a look at your opener’s user manual, usually it will explicitly mention the term Security+ 2.0.

Unlike older systems, which worked by simply shorting the two button wires, Security+ 2.0 enforces the use of encoded signals. This allows not only open/close commands, but also richer feedback such as whether the door is partially open or the light is on.


Q: Why couldn’t earlier versions of OpenGarage support it directly?
A: Previous versions (like v2.2) relied on shorting the two button wires — which no longer works with Security+ 2.0. To control those systems, you had to use an external adapter (e.g., the Security+ 2.0 adapter that we sell) as a “middleman.” When the two wires on the adapter are shorted, it generates encoded signals accepted by the opener.


Q: What is Ratgdo?
A: Ratgdo (Rage Against The Garage Door Opener) is an open-source project developed by Paul Wieland. It allows a microcontroller (such as an ESP8266) to directly speak the Security+ 2.0/1.0 protocols via GPIO pins. In effect, Ratgdo replicates what a proprietary Security+ 2.0 adapter does — enabling direct open/close/stop commands, door status reporting, and even light control.


Q: What hardware changes are in OpenGarage v2.3+?
A: v2.3+ incorporates the same type of control circuits shared by the ratgdo community (see rat-ratgdo). It uses two MOSFETs — one for transmitting, one for receiving — to safely interface with the opener’s signal/button wire (typically 12VDC).

⚠️ Important: Because of this design, v2.3+ is NOT compatible with legacy openers that use AC (e.g., 24 VAC) on the control /button wires. Using it on those systems could damage the circuitry. For those setups, OpenGarage v2.2 remains the recommended model.


Q: When will OpenGarage v2.3+ be available?
A: We’re now accepting pre-orders, with shipments expected no later than early October 2025.


Q: Does v2.3+ still use the built-in ultrasonic distance sensor?
A: Since Security+ 2.0 directly reports the door’s open/close status, there’s no need to rely on the ultrasonic sensor for that purpose. In Security+ 2.0 mode, v2.3+ will not use the sensor for door status, but it will continue using it to detect vehicle presence in the garage.


Q: Will OpenGarage v2.2 still be sold?
A: Yes. Since v2.2 is compatible with legacy openers, including both AC and DC systems (via its onboard solid-state relay), we’ll continue offering it alongside v2.3+.


Q: If v2.2 works with an external Security+ 2.0 adapter, why upgrade to v2.3+?
A: Two key reasons:

  1. More features — v2.3+ enables additional features such as reporting partial open status and toggle the opener’s light, which Security+ 2.0 adapters can’t provide.
  2. Lower cost — buying v2.2 plus an external adapter costs more than a single v2.3+.

Bottom line: Choose v2.3+ if your garage door system is made by Chamberlain, LiftMaster, or Craftsman. For all other brands, use v2.2. (Technically, any system with button wires that output DC below 20 V can use v2.3+, but it offers no benefit on other brands since they don’t support the Security+ protocol.)


Q: Can I modify my existing v2.2 to support Security+ 2.0?
A: In theory, yes — by adding MOSFETs and resistors. But unless you’re experienced with soldering, we don’t recommend it.


Q: What about Security+ 1.0?
A: Security+ 1.0 (mid-1990s–2010) was Chamberlain/LiftMaster’s first rolling-code system. It used colored learn buttons (purple, red, orange, green), but shorting the two wires still worked. Its status reporting is limited compared to 2.0. Ratgdo also supports Security+ 1.0, so with v2.3+ you can still read door status and control the opener’s light on those systems.


Q: I just bought an OpenGarage — can I exchange it for v2.3+?
A: Yes. Purchases made within the last 30 days qualify for our no-questions-asked return/refund policy (see our terms and conditions).


Summary

✨ With v2.3+, OpenGarage now natively supports the Security+ 2.0 technology — no additional adapters required, more features unlocked, and the same compact design!

Announcing OpenGarage Firmware 1.2.0

We are happy to announce that OpenGarage firmware 1.2.0 is now officially available. The main change of this firmware is on cloud connection options for remote access: it now supports both Blynk and OpenThings Cloud (OTC) connections. Previous firmwares have only supported Blynk. The motivation for this change is the fact that the Blynk team is officially ending the Blynk legacy app and legacy server; in the meantime we have developed our own cloud proxy called OpenThingsFramework. So it’s the right time for us to push out our own cloud framework.

What are the technical differences? With Blynk, data is stored on the cloud server, which serves as a ‘cache’ between the application and firmware. In contrast, OpenThingsFramework is a proxy — it does not store data on the cloud server, instead, when a request comes from the application, it’s forwarded directly to the firmware, which sends responds back. This is implemented using WebSocket and persistent TCP connection. There are pros and cons of each approach. For example, Blynk has a faster response time, since the data is ‘cached’ on the cloud server; however, the firmware design is more complicated as the built-in web interface of OpenGarage cannot be easily replicated using Blynk. Also, some users may have privacy concerns over data stored on the cloud server. With OpenThingsFramework, data is never stored on the cloud server; and its proxy nature allows the same built-in web interface to be remotely accessible. This significantly simplifies the firmware design: only a small number of changes are needed in firmware code to allow remote access. On the other hand, the response speed can be slow, since the server does not ‘cache’ any data.

Both Blynk and OTC options are supported by our OpenGarage mobile app, as well as a simple OpenGarage web app that I wrote. To users, the practical differences are as follows: push notification is only available with Blynk, and you must have the Blynk legacy app installed on your phone. This legacy app is no longer available in the app store (since the Blynk team has discontinued it). However, if you are Android user, you can still find and install this app manually. That said, you can always use IFTTT for push notification, which is independent of either Blynk or OTC. If you need the ability to remotely access the full built-in user interface of OpenGarage, including changing settings and viewing log data, only OTC supports it. Otherwise, if you just need the ability to check door status and car status, and trigger door actions remotely, you can go with either of them. Please note that as the official Blynk server is going offline soon, if you want to use Blynk, we recommend you to create your Blynk token on our own server at openthings.io. The support article here explains how to create and use Blynk and OTC tokens respectively. I’ve also created a new OpenGarage video that gives you a quick walk-through of the steps. The section starting at 7:25 is about cloud tokens:

If you decide to upgrade to firmware 1.2.0, please note that it requires ESP8266 WiFi chip that has 4MB flash. Most OpenGarage units sold in recent years have 4MB flash, the only exceptions are the early versions (v1.0, 1.1 and 1.2 I believe). Also, as this firmware has changed the flash memory layout, it will trigger a factory reset so it will lose all settings and WiFi configuration. You will need to reconfigure WiFi after the firmware update. Finally, you can choose to use either Blynk or OTC, but you can’t use both of them at the same time.

That’s all. Thanks!